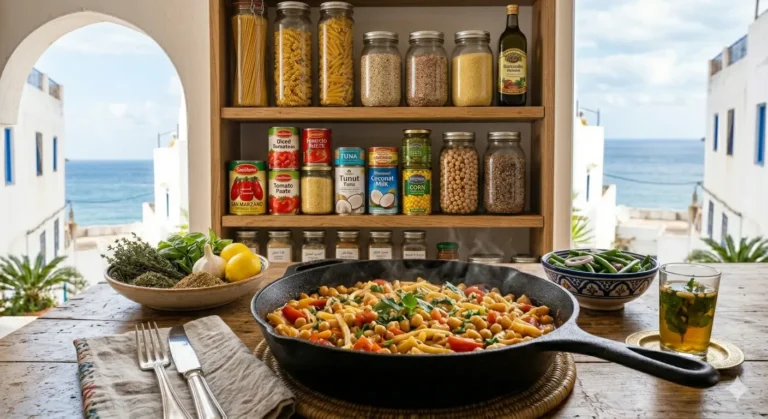
Chickpea Spinach Curry
A quick chickpea spinach curry with coconut milk, tomato, and pantry spices, built for a filling dinner that does not need long simmering.
This curry is gentle, flexible, and useful when the fridge is nearly empty. Canned chickpeas make it fast, spinach adds freshness, and the sauce becomes rich enough with a short simmer and a squeeze of lemon at the end.
This recipe lives in Quick Recipes and is written for home cooking, with clear steps and realistic ingredient guidance.
Why this recipe works
This recipe is written for ordinary home kitchens, with clear steps and enough context to help readers understand the timing, texture, and small decisions that shape the final result.
The goal is repeatability. Readers should be able to cook it once, learn what matters, and come back later with confidence instead of guessing their way through the process.
Quick snapshot
Ingredients
- 2 cans chickpeas, drained
- 1 onion, diced
- 3 garlic cloves, minced
- 1 tbsp grated ginger
- 2 tbsp tomato paste
- 1 tsp curry powder
- 1/2 tsp turmeric
- 400 ml coconut milk
- 150 g spinach
- 1 tbsp lemon juice
- 2 tbsp oil
- salt
Method
- Cook the onion in oil until soft and lightly golden at the edges.
- Add garlic, ginger, tomato paste, curry powder, turmeric, and salt, stirring for 1 minute.
- Add chickpeas and coconut milk, then simmer for 15 minutes until the sauce thickens.
- Crush a few chickpeas against the pan to give the curry more body.
- Fold in spinach and lemon juice, then serve with rice or flatbread.
Key ingredients and adjustments
The key ingredients here are the liquid base, the richer element that rounds out the flavor, and the part that sets the final texture. When cream or yolks are involved, temperature matters as much as quantity.
If you need to adapt the recipe, make small adjustments. Thin with warm liquid, balance acidity near the end, and avoid aggressive substitutions that change the character of the dish all at once.
Before you start
Read the recipe once before you start and prep the ingredients in advance so you can cook without unnecessary pauses between the important steps.
Adjust heat and seasoning gradually. In home cooking, small corrections made at the right time are usually more useful than one large correction at the end.
Success notes
A few crushed chickpeas make the sauce thicker without flour or extra cream. Add spinach only at the end so it stays green and does not disappear into the sauce.
For a steadier finish, temper cream or yolks with warm liquid before adding them fully, and avoid a hard boil once they are in. That keeps the texture smoother and lowers the chance of splitting.
Common mistakes
- Adding cold cream or yolks straight into very hot liquid can split the texture and make the finish look rough.
- Adding too much flour too quickly often makes the mixture heavy and hides the texture you actually want.
- Leaving garlic over high heat for too long can turn it bitter and shift the whole flavor profile.
- Seasoning only at the very end often leads to a dish that is technically finished but flatter than it should be.
Serving ideas
Serve the dish at the moment its texture is at its best and pair it with something simple that keeps the meal balanced. The suggested related recipes and guides are there to help readers turn one page into a fuller menu.
Storage
Cool the dish promptly, store it in a clean sealed container, and adapt the storage temperature to the main ingredients. When in doubt, chill faster and use it sooner rather than stretching the timeline.
Frequently asked questions
Can I make part of this recipe ahead of time?
Usually yes. Ingredient prep, partial cooking, or a controlled rest can often be done in advance, as long as the final texture-sensitive steps are saved for the right moment.
How do I keep the texture from going wrong?
Watch heat, moisture, and timing more closely than the clock alone. Most texture problems come from rushing, using too much dry ingredient too early, or skipping small adjustments during cooking.
How should I store leftovers?
Cool the food safely, store it in a sealed container, and reheat only what you plan to eat. The exact storage window depends on the ingredients and how the dish was handled after cooking.
Note: always check allergens and adapt the recipe to your ingredients and needs.